If you’re looking for a delicious gluten-free sourdough recipe, you’ve come to the right place! Many people love sourdough for its complex flavors and chewy texture, but finding a gluten-free version that delivers the same satisfaction can be challenging. This guide will walk you through the entire process, from creating a gluten-free sourdough starter to baking the perfect loaf.
Table of Contents
ToggleMaking gluten-free sourdough from scratch may seem daunting, but with a few essential tips and techniques, you’ll be able to enjoy fresh, homemade sourdough bread in no time. Plus, this gluten-free recipe keeps all the signature tang and airy texture of traditional sourdough while using only gluten-free ingredients.
What Makes Gluten-Free Sourdough Different?
Traditional sourdough relies on a mix of flour and water to create a natural yeast environment for fermentation. The fermentation process gives a tangy flavor and airy texture that sourdough is famous for. Gluten-free sourdough, however, uses gluten-free flour and requires a bit more attention to achieve similar results. Since gluten is the protein that gives traditional sourdough its stretchiness and structure, a gluten-free version needs additional support to hold its shape.
Don’t worry, though! Following this gluten-free sourdough recipe, you’ll learn how to create the same fluffy, tangy loaf with just a few tweaks. With the right ingredients and techniques, you’ll be able to achieve that signature sourdough taste without any gluten.
Ingredients You’ll Need for Gluten-Free Sourdough
Here’s a list of ingredients needed to make gluten-free sourdough from scratch.
For the Starter:
- ½ cup gluten-free flour blend (a blend containing rice flour, potato starch, and tapioca flour works well)
- ¼ cup filtered water (adjust if needed for a thick, pancake-like consistency)
For the Bread Dough:
- 1 cup active gluten-free sourdough starter
- 2 cups gluten-free flour blend (you can use a store-bought gluten-free all-purpose blend or make your own)
- 1 cup filtered water
- 1 tablespoon psyllium husk powder (for structure and binding)
- 1 tablespoon honey or maple syrup (optional, for a slight sweetness)
- 1 teaspoon sea salt
Optional Additions:
- Seeds (such as chia, sunflower, or sesame) for extra texture
- Herbs like rosemary or thyme for added flavor
Step 1: Creating Your Gluten-Free Sourdough Starter
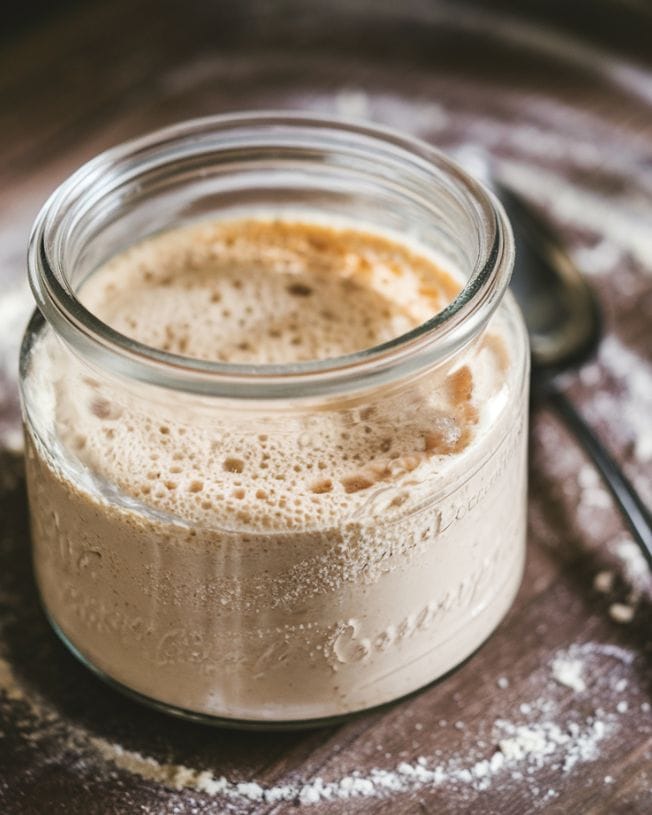
The starter is the foundation of sourdough, and gluten-free sourdough is no exception. It’s a mix of flour and water that ferments over several days, capturing wild yeast and bacteria to give your bread its distinctive sourdough taste. Let’s dive into the steps to create a gluten-free starter from scratch.
- Day 1: In a glass jar, combine ½ cup of gluten-free flour blend with ¼ cup of filtered water. Stir until smooth, cover loosely with a lid or cloth, and set in a warm spot (around 70°F is ideal).
- Day 2: Check for bubbles. If you see a few, that’s a good sign! Discard half of the starter, then feed it with another ½ cup of gluten-free flour and ¼ cup of water.
- Day 3–5: Repeat the feeding process once daily. By day 5, your starter should have a bubbly, slightly sour aroma, meaning it’s ready to use.
Pro Tip: If your starter is too thick, add a bit more water to achieve a thick, pancake-like consistency. If it’s too thin, add a bit more flour.
Step 2: Preparing the Gluten-Free Sourdough Bread Dough
Once your gluten-free sourdough starter is active and bubbly, it’s time to prepare the bread dough. Make sure you have all your ingredients ready, as gluten-free doughs can dry out if left too long.
- Combine Ingredients: In a mixing bowl, combine 1 cup of active starter, 2 cups of gluten-free flour blend, 1 cup of filtered water, 1 tablespoon of psyllium husk powder, honey (if using), and salt. Mix until a sticky dough forms.
- Rest the Dough: Cover the bowl with a cloth and let the dough rest for 30 minutes. This step allows the psyllium husk to absorb water, which helps improve the dough’s elasticity and structure.
- Knead Gently: Gluten-free doughs don’t need heavy kneading. Instead, gently fold the dough a few times to create structure without overworking it.
Step 3: Let the Dough Rise
With the dough ready, it’s time for the first rise. This stage gives the dough a chance to develop more flavor.
- Cover and Rise: Place the dough in a greased bowl, cover it, and let it rise for 4–6 hours in a warm spot. A warm kitchen counter works well but avoid direct sunlight.
- Check for Activity: The dough may not double like traditional sourdough, but it should become slightly puffier and airy. If you notice bubbles or a slight lift, the dough is ready.
Step 4: Shaping and Final Rise
After the first rise, it’s time to shape the dough and allow it to rest again before baking.
- Shape the Dough: Lightly flour a work surface with gluten-free flour. Gently shape the dough into a round or oval loaf, tucking in the sides as you go.
- Place in a Proofing Basket or Bowl: If you have a proofing basket, place the loaf in it for structure. Otherwise, a bowl lined with parchment paper will work.
- Final Rise: Cover and let the dough rise for another 1–2 hours. The dough should feel airy and have a slight give when pressed.
Step 5: Baking Your Gluten-Free Sourdough Bread
Now comes the most exciting part—baking your gluten-free sourdough loaf! A Dutch oven is ideal for baking sourdough, as it helps trap steam, creating a nice crust.
- Preheat the Oven: Preheat your oven to 450°F (232°C) with the Dutch oven inside for at least 30 minutes.
- Score the Loaf: Carefully turn the dough onto a piece of parchment paper. Use a sharp knife or razor blade to score the top of the loaf—this helps control the expansion while baking.
- Bake: Place the dough (on parchment paper) inside the hot Dutch oven, cover it, and bake for 30 minutes. Then, remove the lid and bake for an additional 15–20 minutes until the crust is golden brown.
- Cool Before Slicing: Let the bread cool on a wire rack for at least 1 hour before slicing. This step is essential, as cooling helps the bread set properly.
Tips for the Perfect Gluten-Free Sourdough Bread
- Be Patient with the Starter: A healthy, active starter is key to making good gluten-free sourdough. If your starter doesn’t bubble within a few days, try placing it in a warmer spot.
- Use Psyllium Husk Powder: Psyllium husk is crucial for gluten-free bread because it helps with binding and gives the bread structure. Without it, the loaf may turn out crumbly.
- Avoid Overproofing: Gluten-free doughs are more delicate than traditional ones. Keeping the rise times short helps prevent the dough from collapsing.
Storing Your Gluten-Free Sourdough Bread
Once baked and cooled, gluten-free sourdough bread is best enjoyed fresh. However, if you have leftovers, you can store them in a few ways:
- At Room Temperature: Wrap the bread in a clean cloth or place it in a paper bag. This method keeps the crust crisp but should be eaten within two days.
- Freezing: For longer storage, slice the loaf and freeze individual slices. When you’re ready to eat, simply toast the slices directly from frozen.
Frequently Asked Questions about Gluten-Free Sourdough Bread
Q: Can I substitute different gluten-free flours in this recipe?
A: Yes, you can experiment with different gluten-free flours like buckwheat, sorghum, or millet. However, keep in mind that each flour has a unique texture and flavor, which may slightly alter the result.
Q: My dough didn’t rise as much as expected. Is that normal?
A: Gluten-free doughs typically rise less than traditional ones. If your dough feels airy and has bubbles, it’s ready to bake, even if it didn’t double in size.
Q: How long does it take for the starter to become active?
A: A gluten-free sourdough starter usually takes around 5–7 days to become fully active. Be patient and continue feeding it daily.
Final Thoughts
Baking gluten-free sourdough bread may feel like an adventure, but the reward of a fresh, homemade loaf is worth every step. This gluten-free sourdough recipe brings you all the flavor and satisfaction of traditional sourdough with none of the gluten, making it perfect for those with dietary restrictions. With patience and practice, you’ll be able to master this recipe and enjoy delicious, gluten-free sourdough whenever

